 Lars' Creative Warehouse
|
|
*
Lars' Creative Warehouse
|
|
Home
|
A shower pan replacementA leaky floor | |
|
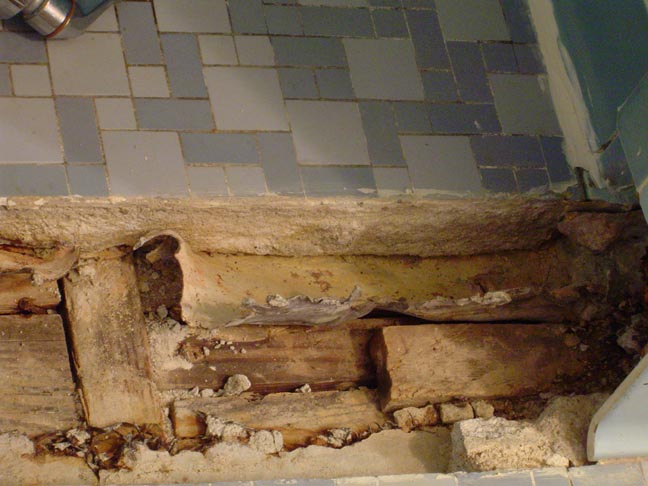
The old floor had leaks It was made originally with a leaden shower pan. Over the joist, the lead lay, and eventually wore away with use. I have never replaced a shower pan, so this was a great opportunity to learn what goes into it. Basically, a helluva' lot of work goes into it. Although building new would have much less demolition and mess, it still is an extensive job to get a solid tile floor that can be walked upon and not leak. The goal,at one point, was to have a 'handicapped accessible' shower which meant no threshhold. Instead of making the entire bathroom floor waterproof with a membrane under the tile, whoever did this, simply removed the threshhold and beat the old lead pan into the opening. By scabbing 3/4" lumber inbetween the joints, the floor was inherently weak. The original slab and tile cracked in line with the joists. With walking on the shower floor, the lead wore against the joists and eventually failed in many places. First step was to remove the patched threshold. The tiles were affixed with liquid nails --my first indication that this was a quick(not)fix cover up job. |
|
|
|
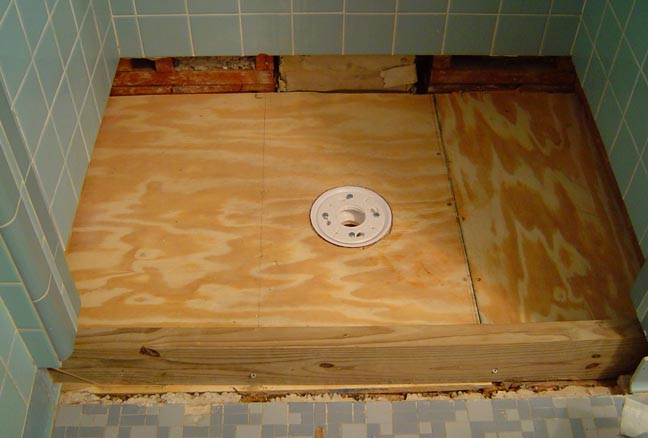
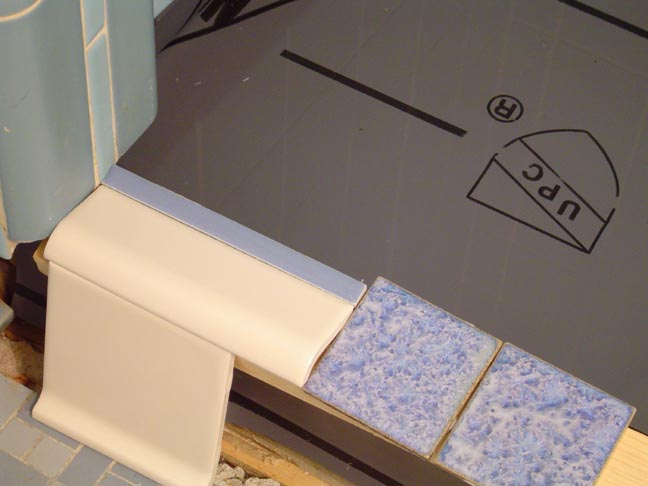
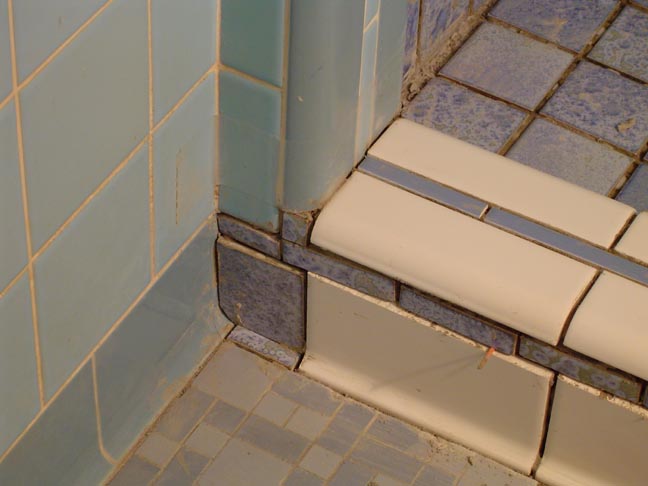
After determining that the lead pan was pretty much shot, I removed the entire floor of the shower and the cove tile along the walls so that the new pan could come up at least as high as the new threshold I was about to build. By spanning the joists with 3/4" plywood, the entire floor acts as a single unit. The 300 pounds of concrete is less likely to fail if evenly supported. A single 2x6 forms the center of the new threshold. Eventually the pvc pan fold up and over this board and a 'metal-lath' and concrete beef it out to 4 inches wide and an inch taller to form the threshold before tile. |
|
New Plywood. | ||
|
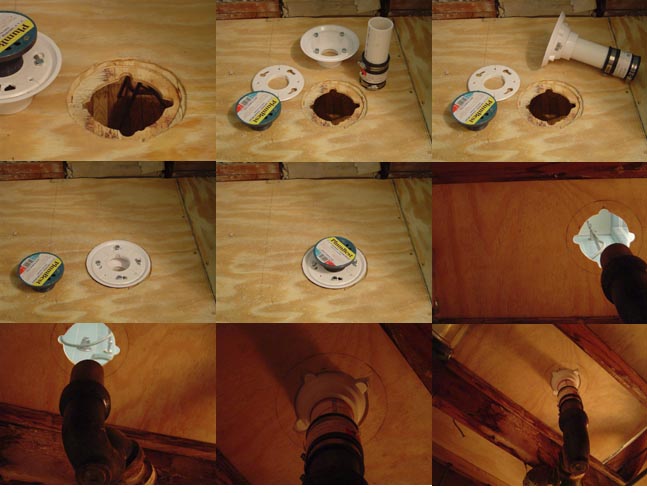
By routing the hole for the drain, the new PVC drain sits flush
to the plywood.
I also sloped the plywood toward the drain by making about 1/4" lower in the center. While standing on the plywood, I glued and screwed it to the joists with deck screws. |
|
Set Drain Into Plywood Floor | ||
|
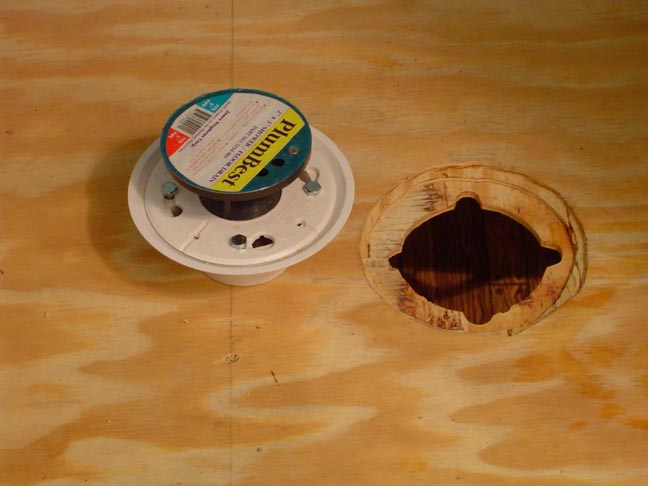
Here is a blow by blow description of the shower floor drain
and how the new pieces fit together. I used the 'saws-all' to
cut the old heavy galvanized 2" pipe.
The old trap was perfectly functional, so I decided to join the PVC drain to the old pipe with a rubber coupling. The black rubber coupling has what looks like radiator hose clamps on both ends. The white plastic ring bolts to the drain assembly and clamps the new shower pan in place. I used a ring of plumbers putty below the pan and clamped it down tight.
|
|
|
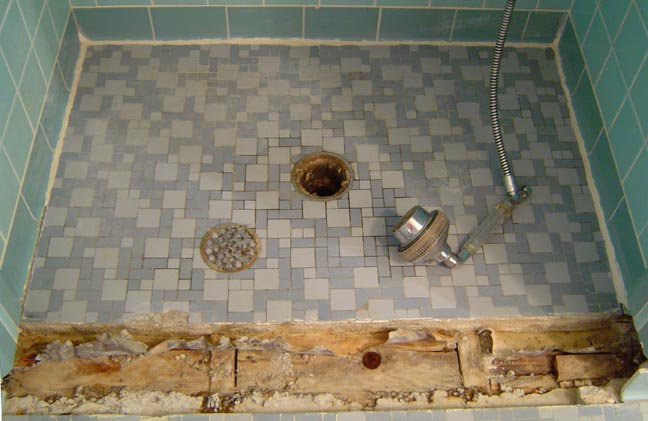
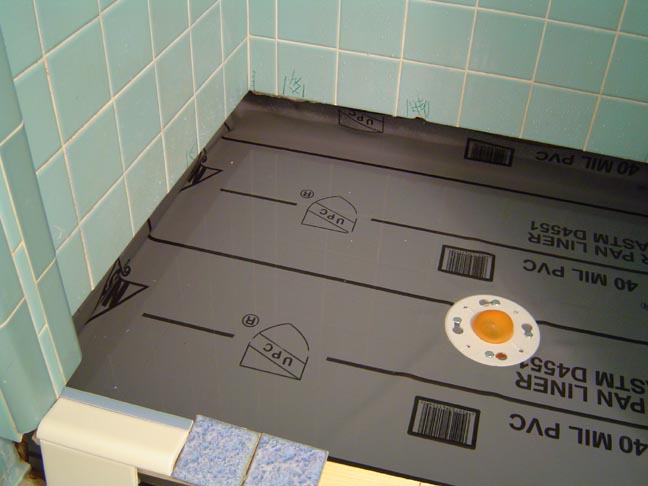
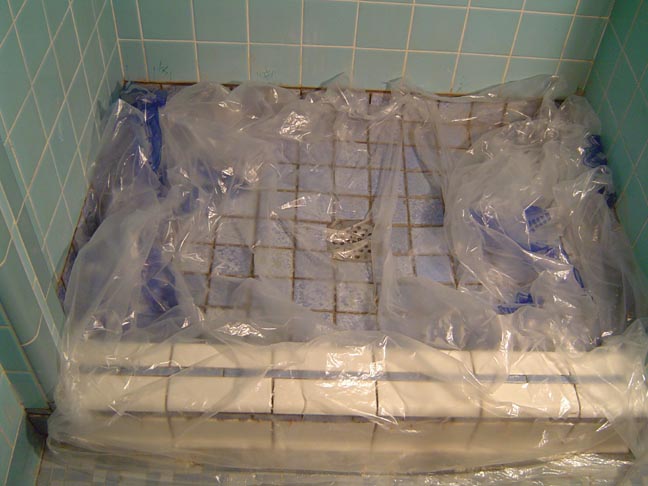
Here the new shower pan is filled to about 4 inches with water. When I first tried it, I had water pouring into the basement because my folds were not correct. After refolding the corners of the pan, there were no leaks. Sorry, there are no pictures of the 'hospital fold' at the corners, but various sites show this. In my case, I only extended the new pan up about even with the new threshold. I am aware that the weak point of this repair is where the old wall tile meets the new pan/concrete/ thinset, tile and grout.
|
|
|
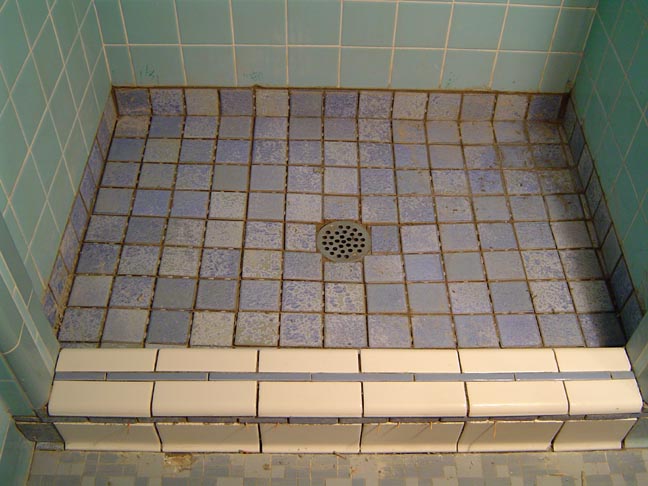
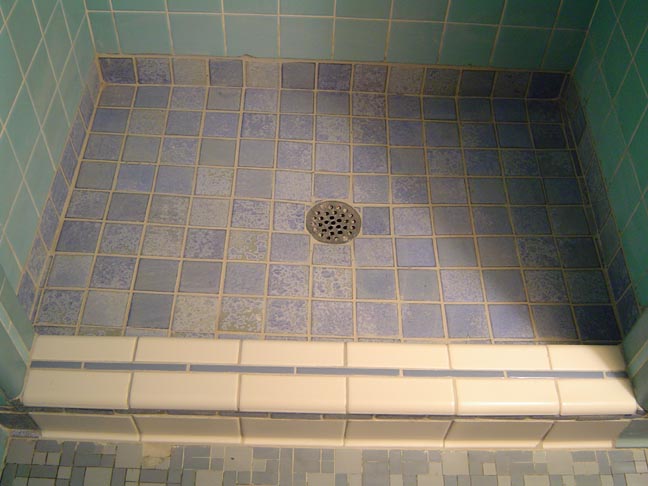
I used various off the shelf tile to try to match the old style as much as possible. Yes, I know, the blue doesn't match. It was important to make sure the tile was available so that I could make the threshold the right height and width.
|
|
|
I was so tired after pouring 300 lbs. of concrete I did not take any photos. Basically, I used a pretty rich mixture of 2.5 sand to 1 portland cement.I added a dash of lime but nothing to change the strength, really, just to make it stickier. After setting the tile, I keep it covered for a day to gain as much strength as possible while curing.
|
|
|
Here the tile looks pretty bad without any grout.
|
|

|
I had a few areas where some tiny tile pieces help make it look nicer. I did not show the 300 lbs. of concrete that is below this tile.
|
|
|
I ended up using small pieces of floor tile for a mosaic like transition to the old tile.
|
|
|
The off-white grout really softens the tiles appearance and since the shower is like a different room, the slightly different blue works out ok. Although the shower is not wheelchair friendly any longer, it will, hopefully, direct the water down the drain and not into the basement since it is sporting a new threshhold.
|